


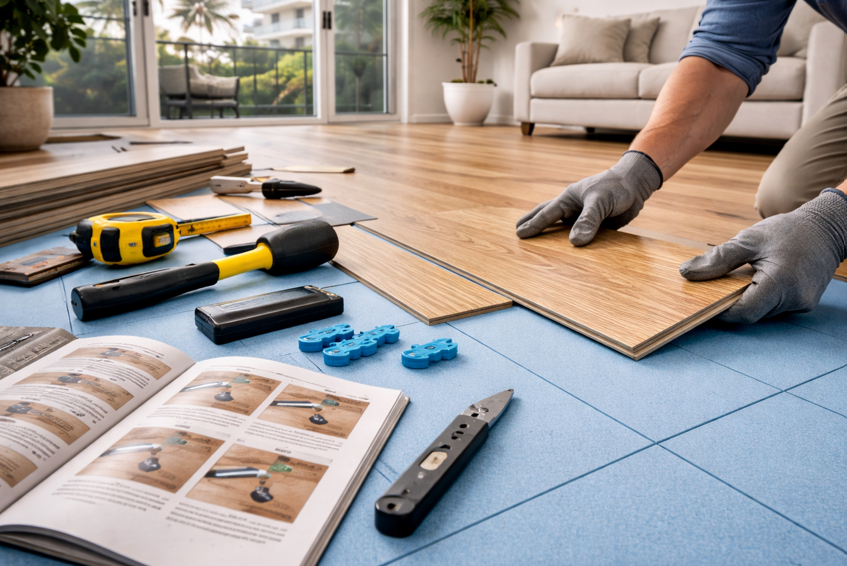
Installing laminate flooring is one of the most rewarding home improvement projects you can take on. It’s a practical way to refresh your space, add style, and improve everyday comfort—all while keeping the process manageable for a confident DIYer.
In Sheboygan homes, laminate flooring is especially popular because it handles daily wear well and works beautifully across different spaces. Whether you're updating a living room, bedroom, or even a basement, the right approach makes all the difference.
At Sheboygan Flooring and Furniture, many homeowners start their flooring journey with the goal of installing it themselves. With proper planning and a clear step-by-step approach, it’s absolutely achievable.
This guide walks you through the full installation process, helping you get professional-looking results while making the experience feel straightforward and rewarding.
What to Know Before You Start
Before jumping into installation, it’s important to set yourself up for success. A little preparation goes a long way in ensuring your flooring looks great and performs well over time.
Laminate flooring is designed as a floating system, which means it isn’t glued or nailed to the subfloor. Instead, the planks lock together and rest above the surface beneath them.
This design makes installation more accessible, but it also means:
The subfloor needs to be level
Expansion space must be allowed
Proper underlayment is essential
You’ll also want to consider the room itself. Temperature, humidity, and traffic levels all play a role in how the flooring behaves once installed.
Taking time to understand these basics helps you avoid common issues and ensures a smoother process from start to finish.
Tools and Materials You’ll Need
Having the right tools on hand makes installation more efficient and enjoyable.
You’ll typically need:
Measuring tape
Utility knife
Spacers
Rubber mallet
Pull bar
Tapping block
Saw (for cutting planks)
In addition to tools, make sure you have all materials ready, including underlayment and your chosen laminate flooring.
Keeping everything organised before you begin helps you stay focused and keeps the process moving smoothly.
Step 1: Prepare the Subfloor
The foundation of your flooring matters more than anything else.
Start by ensuring the subfloor is:
Clean
Dry
Level
Even small uneven areas can affect how laminate planks sit and lock together. If needed, use a levelling compound to smooth out imperfections.
In Sheboygan homes, especially during seasonal changes, it’s also important to check for moisture. A dry, stable surface helps prevent movement after installation.
Taking the time to prepare properly sets the stage for a polished, long-lasting result.
Step 2: Acclimate the Flooring
Before installation, laminate planks need time to adjust to the environment of your home.
Place the unopened boxes in the room where they’ll be installed and leave them there for at least 48 hours.
This allows the flooring to adapt to:
Temperature
Humidity levels
Skipping this step can lead to expansion or contraction after installation, which may affect the final look.
A little patience here goes a long way in ensuring your flooring performs as expected.
Step 3: Install the Underlayment
Underlayment plays a key role in how your floor feels and performs.
It provides:
Cushioning
Sound reduction
Moisture protection
Roll out the underlayment across the subfloor, ensuring full coverage. Trim as needed and secure it according to the product guidelines.
In Wisconsin homes, where seasonal moisture can vary, choosing the right underlayment helps maintain a stable and comfortable surface.
This step creates the base for everything that follows.
Step 4: Plan Your Layout
Before laying the first plank, take a moment to plan your layout.
Consider:
The direction of the planks
How the flooring aligns with the room shape
Where cuts will be needed
Planks are often installed parallel to the longest wall or in the direction of natural light.
Planning ahead helps you avoid narrow pieces at the edges and ensures a balanced, professional look.
Step 5: Start Installing the First Row
Begin along one wall, placing spacers between the planks and the wall to allow for expansion.
Lay the first row carefully, ensuring each plank is aligned and locked into place.
This row sets the foundation for the rest of the installation, so taking your time here is important.
A straight, well-placed first row makes the rest of the process much smoother.
Step 6: Continue Laying the Planks
Once the first row is in place, continue building out the floor row by row.
Each plank should click securely into the next. Use a tapping block and mallet if needed to ensure a snug fit.
Stagger the joints between rows to create a natural, visually appealing pattern.
Working steadily and checking alignment as you go helps maintain consistency across the entire floor.
Step 7: Cut and Fit Around Edges
As you reach walls, doorways, and corners, you’ll need to cut planks to fit.
Measure carefully and make clean cuts to ensure a precise fit.
Leave expansion space around all edges, as this allows the flooring to adjust naturally over time.
Taking care with these details helps create a seamless, finished appearance.
Step 8: Install the Final Row
The final row may require more precise cutting to fit the remaining space.
Use a pull bar to secure the last planks in place, ensuring they lock properly with the previous row.
Even though it’s the last step of installation, it’s just as important as the first. A well-fitted final row completes the look of your floor.
Step 9: Add Finishing Touches
Once the flooring is installed, remove the spacers and install baseboards or trim to cover the expansion gaps.
These finishing touches:
Create a polished appearance
Secure the edges
Complete the overall look
Take a moment to walk through the space and ensure everything feels solid and aligned.
This is where your project comes together.
Common DIY Mistakes to Avoid
Even experienced DIYers can run into a few common challenges.
Skipping Subfloor Preparation
An uneven surface can affect the entire installation.
Forgetting Expansion Gaps
Without space to expand, the flooring may shift over time.
Rushing the Process
Taking your time ensures better results.
Not Using the Right Tools
Proper tools make installation easier and more precise.
Avoiding these mistakes helps you achieve a clean, professional finish.
When to Consider Professional Installation
While DIY installation is achievable, some situations benefit from professional expertise.
This includes:
Complex room layouts
Uneven subfloors
Large-scale projects
Working with experienced professionals ensures everything is handled with precision and care.
It also provides peace of mind, knowing your flooring is installed for long-term performance.
Bring Your Flooring Project to Life
Installing laminate flooring is a rewarding project that can transform your home. With the right preparation, tools, and approach, you can achieve a result that looks great and performs well.
From preparing the subfloor to adding the final touches, each step plays a role in creating a space that feels comfortable and complete.
If you have questions or want guidance before getting started, feel free to get in touch. A knowledgeable team can help you make confident decisions and set your project up for success.


